|
|
5 years ago | |
|---|---|---|
| .. | ||
| app | 5 years ago | |
| gradle/wrapper | 5 years ago | |
| images | 5 years ago | |
| .gitignore | 5 years ago | |
| README.md | 5 years ago | |
| build.gradle | 5 years ago | |
| gradle.properties | 5 years ago | |
| gradlew | 5 years ago | |
| gradlew.bat | 5 years ago | |
| settings.gradle | 5 years ago | |
README.md
MindSpore Lite 端侧骨骼检测demo(Android)
本示例程序演示了如何在端侧利用MindSpore Lite API以及MindSpore Lite骨骼检测模型完成端侧推理,对设备摄像头捕获的内容进行检测,并在App图像预览界面中显示连续目标检测结果。
运行依赖
- Android Studio >= 3.2 (推荐4.0以上版本)
- NDK 21.3
- CMake 3.10
- Android SDK >= 26
构建与运行
-
在Android Studio中加载本示例源码,并安装相应的SDK(指定SDK版本后,由Android Studio自动安装)。
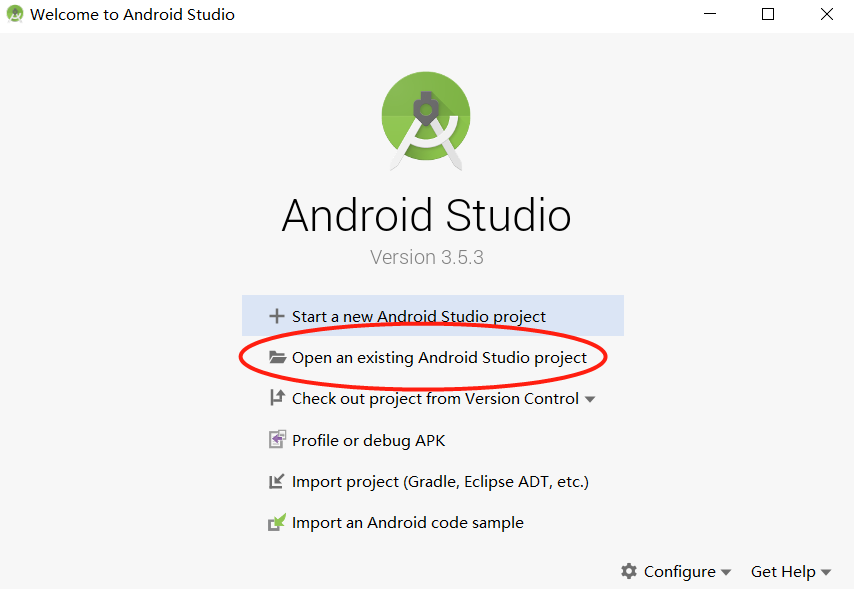
启动Android Studio后,点击
File->Settings->System Settings->Android SDK,勾选相应的SDK。如下图所示,勾选后,点击OK,Android Studio即可自动安装SDK。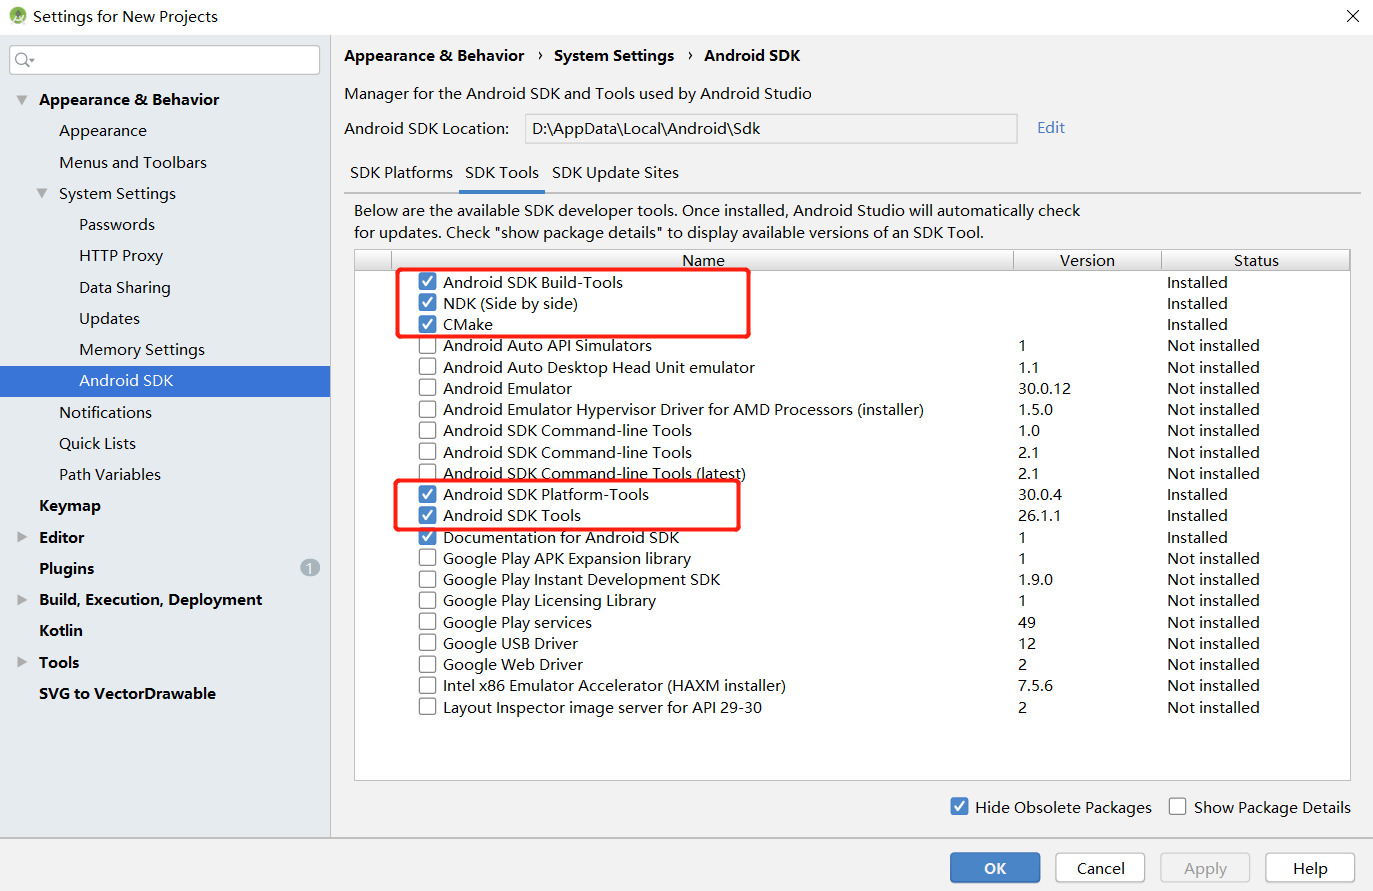
使用过程中若出现Android Studio配置问题,可参考第5项解决。
-
连接Android设备,运行骨骼检测示例应用程序。
通过USB连接Android设备调试,点击
Run 'app'即可在你的设备上运行本示例项目。编译过程中Android Studio会自动下载MindSpore Lite、模型文件等相关依赖项,编译过程需做耐心等待。

Android Studio连接设备调试操作,可参考https://developer.android.com/studio/run/device?hl=zh-cn。
-
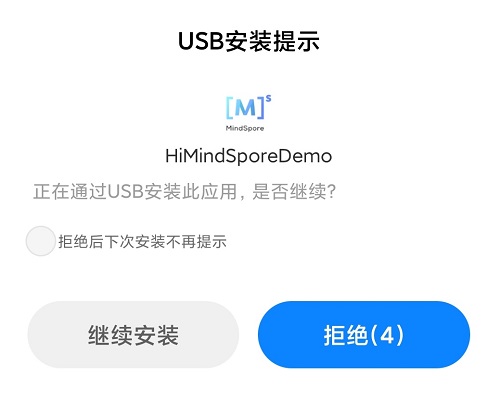
在Android设备上,点击“继续安装”,安装完即可查看到设备摄像头捕获的内容和推理结果。
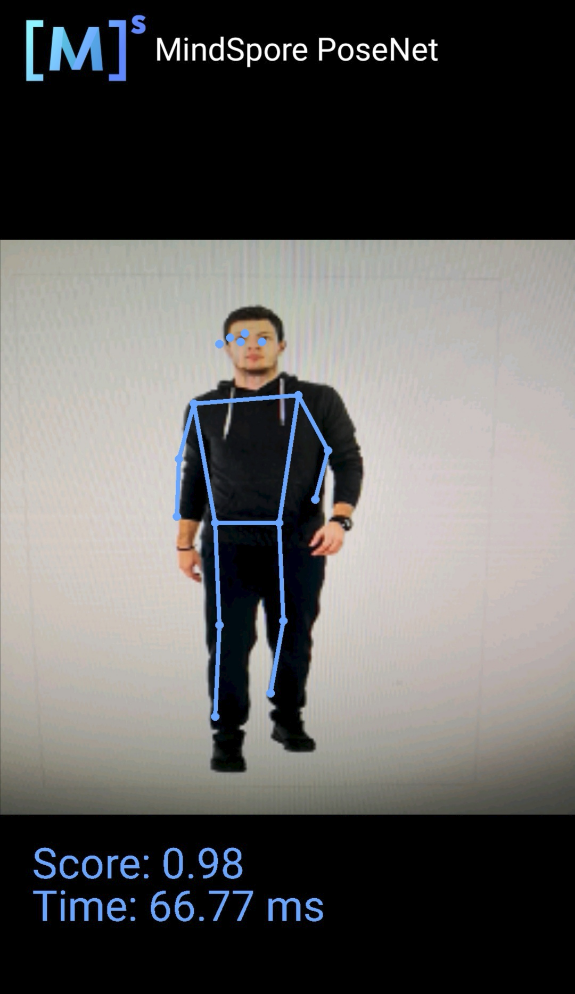
使用骨骼检测模型的输出如图:
蓝色标识点检测人体面部的五官分布及上肢、下肢的骨骼走势。此次推理置信分数0.98/1,推理时延66.77ms。
-
Android Studio 配置问题解决方案可参考下表:
报错 解决方案 1 Gradle sync failed: NDK not configured. 在local.properties中指定安装的ndk目录:ndk.dir={ndk的安装目录} 2 Requested NDK version did not match the version requested by ndk.dir 可手动下载相应的NDK版本,并在Project Structure - Android NDK location设置中指定SDK的位置(可参考下图完成) 3 This version of Android Studio cannot open this project, please retry with Android Studio or newer. 在工具栏-help-Checkout for Updates中更新版本 4 SSL peer shut down incorrectly 重新构建 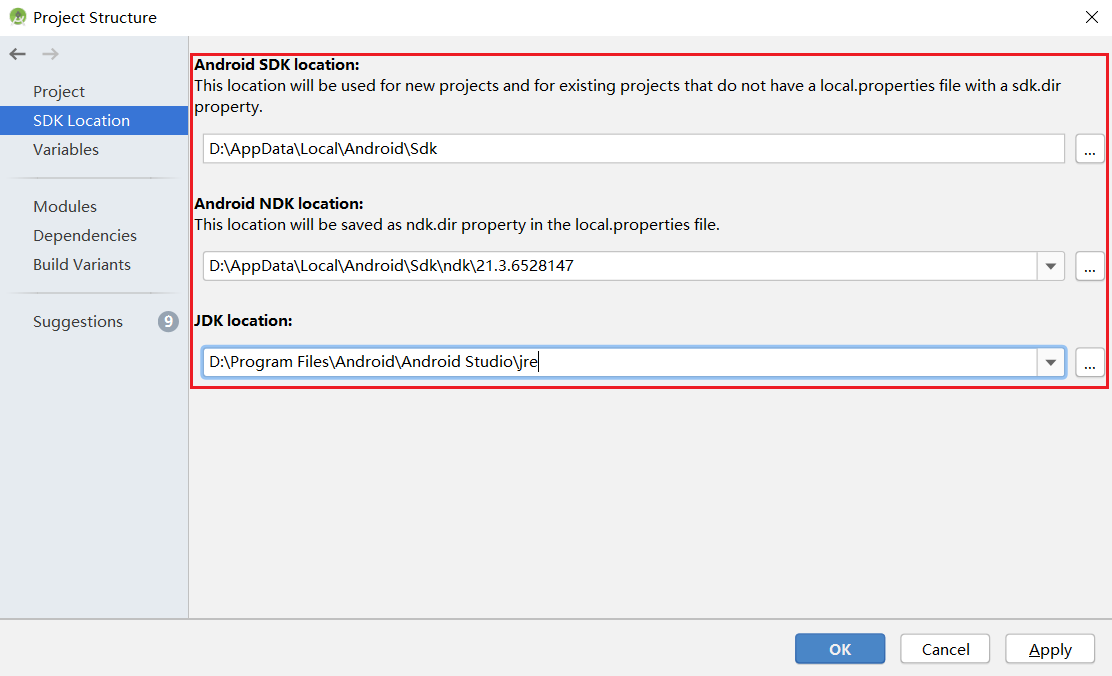
示例程序详细说明
骨骼检测Android示例程序通过Android Camera 2 API实现摄像头获取图像帧,以及相应的图像处理等功能,在Runtime中完成模型推理的过程。
示例程序结构
├── app
│   ├── build.gradle # 其他Android配置文件
│   ├── download.gradle # APP构建时由gradle自动从HuaWei Server下载依赖的库文件及模型文件
│   ├── proguard-rules.pro
│   └── src
│       ├── main
│       │   ├── AndroidManifest.xml # Android配置文件
│       │   ├── java # java层应用代码
│       │   │   └── com
│       │   │       └── mindspore
│       │   │           └── posenetdemo # 图像处理及推理流程实现
│       │   │               ├── CameraDataDealListener.java
│       │   │               ├── ImageUtils.java
│       │   │               ├── MainActivity.java
│       │   │               ├── PoseNetFragment.java
│       │   │               ├── Posenet.java #
│       │   │               └── TestActivity.java
│       │   └── res # 存放Android相关的资源文件
│       └── test
└── ...
下载及部署模型文件
从MindSpore Model Hub中下载模型文件,本示例程序中使用的目标检测模型文件为posenet_model.ms,同样通过download.gradle脚本在APP构建时自动下载,并放置在app/src/main/assets工程目录下。
若下载失败请手动下载模型文件,posenet_model.ms 下载链接。
编写端侧推理代码
在骨骼检测demo中,使用Java API实现端测推理。相比于C++ API,Java API可以直接在Java Class中调用,无需实现JNI层的相关代码,具有更好的便捷性。
-
本实例通过识别鼻子眼睛等身体特征、获取身体特征位置、计算结果的置信分数,来实现骨骼检测的目的。
public enum BodyPart {
    NOSE,
    LEFT_EYE,
    RIGHT_EYE,
    LEFT_EAR,
    RIGHT_EAR,
    LEFT_SHOULDER,
    RIGHT_SHOULDER,
    LEFT_ELBOW,
    RIGHT_ELBOW,
    LEFT_WRIST,
    RIGHT_WRIST,
    LEFT_HIP,
    RIGHT_HIP,
    LEFT_KNEE,
    RIGHT_KNEE,
    LEFT_ANKLE,
    RIGHT_ANKLE
}

public class Position {
    int x;
    int y;
}

public class KeyPoint {
    BodyPart bodyPart = BodyPart.NOSE;
    Position position = new Position();
    float score = 0.0f;
}

public class Person {
    List<KeyPoint> keyPoints;
    float score = 0.0f;
}
骨骼检测demo推理代码流程如下,完整代码请参见:src/main/java/com/mindspore/posenetdemo/Posenet.java。
-
加载MindSpore Lite模型文件,构建上下文、会话以及用于推理的计算图。
-
加载模型:从文件系统中读取MindSpore Lite模型,并进行模型解析。
// Load the .ms model. model = new Model(); if (!model.loadModel(mContext, "posenet_model.ms")) { Log.e("MS_LITE", "Load Model failed"); return false; } -
创建配置上下文:创建配置上下文
MSConfig,保存会话所需的一些基本配置参数,用于指导图编译和图执行。// Create and init config. msConfig = new MSConfig(); if (!msConfig.init(DeviceType.DT_CPU, NUM_THREADS, CpuBindMode.MID_CPU)) { Log.e("MS_LITE", "Init context failed"); return false; } -
创建会话:创建
LiteSession,并调用init方法将上一步得到MSConfig配置到会话中。// Create the MindSpore lite session. session = new LiteSession(); if (!session.init(msConfig)) { Log.e("MS_LITE", "Create session failed"); msConfig.free(); return false; } msConfig.free(); -
加载模型文件并构建用于推理的计算图
// Complile graph.
if (!session.compileGraph(model)) {
    Log.e("MS_LITE", "Compile graph failed");
    model.freeBuffer();
    return false;
}

// Note: when use model.freeBuffer(), the model can not be complile graph again.
model.freeBuffer();
-
-
输入数据: Java目前支持
byte[]或者ByteBuffer两种类型的数据,设置输入Tensor的数据。-
在输入数据之前,需要对存储图像信息的Bitmap进行解读分析与转换。
/** * Scale the image to a byteBuffer of [-1,1] values. */ private ByteBuffer initInputArray(Bitmap bitmap) { final int bytesPerChannel = 4; final int inputChannels = 3; final int batchSize = 1; ByteBuffer inputBuffer = ByteBuffer.allocateDirect( batchSize * bytesPerChannel * bitmap.getHeight() * bitmap.getWidth() * inputChannels ); inputBuffer.order(ByteOrder.nativeOrder()); inputBuffer.rewind(); final float mean = 128.0f; final float std = 128.0f; int[] intValues = new int[bitmap.getWidth() * bitmap.getHeight()]; bitmap.getPixels(intValues, 0, bitmap.getWidth(), 0, 0, bitmap.getWidth(), bitmap.getHeight()); int pixel = 0; for (int y = 0; y < bitmap.getHeight(); y++) { for (int x = 0; x < bitmap.getWidth(); x++) { int value = intValues[pixel++]; inputBuffer.putFloat(((float) (value >> 16 & 0xFF) - mean) / std); inputBuffer.putFloat(((float) (value >> 8 & 0xFF) - mean) / std); inputBuffer.putFloat(((float) (value & 0xFF) - mean) / std); } } return inputBuffer; } -
通过
ByteBuffer输入数据。long estimationStartTimeNanos = SystemClock.elapsedRealtimeNanos(); ByteBuffer inputArray = this.initInputArray(bitmap); List<MSTensor> inputs = session.getInputs(); if (inputs.size() != 1) { return null; } Log.i("posenet", String.format("Scaling to [-1,1] took %.2f ms", 1.0f * (SystemClock.elapsedRealtimeNanos() - estimationStartTimeNanos) / 1_000_000)); MSTensor inTensor = inputs.get(0); inTensor.setData(inputArray); long inferenceStartTimeNanos = SystemClock.elapsedRealtimeNanos();
-
-
对输入Tensor按照模型进行推理,获取输出Tensor,并进行后处理。
-
使用
runGraph进行模型推理。// Run graph to infer results. if (!session.runGraph()) { Log.e("MS_LITE", "Run graph failed"); return null; } lastInferenceTimeNanos = SystemClock.elapsedRealtimeNanos() - inferenceStartTimeNanos; Log.i( "posenet", String.format("Interpreter took %.2f ms", 1.0f * lastInferenceTimeNanos / 1_000_000) ); -
通过输出Tensor得到推理结果。
// Get output tensor values. List<MSTensor> heatmaps_list = session.getOutputsByNodeName("Conv2D-27"); if (heatmaps_list == null) { return null; } MSTensor heatmaps_tensors = heatmaps_list.get(0); float[] heatmaps_results = heatmaps_tensors.getFloatData(); int[] heatmapsShape = heatmaps_tensors.getShape(); //1, 9, 9 ,17 float[][][][] heatmaps = new float[heatmapsShape[0]][][][]; for (int x = 0; x < heatmapsShape[0]; x++) { // heatmapsShape[0] =1 float[][][] arrayThree = new float[heatmapsShape[1]][][]; for (int y = 0; y < heatmapsShape[1]; y++) { // heatmapsShape[1] = 9 float[][] arrayTwo = new float[heatmapsShape[2]][]; for (int z = 0; z < heatmapsShape[2]; z++) { //heatmapsShape[2] = 9 float[] arrayOne = new float[heatmapsShape[3]]; //heatmapsShape[3] = 17 for (int i = 0; i < heatmapsShape[3]; i++) { int n = i + z * heatmapsShape[3] + y * heatmapsShape[2] * heatmapsShape[3] + x * heatmapsShape[1] * heatmapsShape[2] * heatmapsShape[3]; arrayOne[i] = heatmaps_results[n]; //1*9*9*17 ?? } arrayTwo[z] = arrayOne; } arrayThree[y] = arrayTwo; } heatmaps[x] = arrayThree; } List<MSTensor> offsets_list = session.getOutputsByNodeName("Conv2D-28"); if (offsets_list == null) { return null; } MSTensor offsets_tensors = offsets_list.get(0); float[] offsets_results = offsets_tensors.getFloatData(); int[] offsetsShapes = offsets_tensors.getShape(); float[][][][] offsets = new float[offsetsShapes[0]][][][]; for (int x = 0; x < offsetsShapes[0]; x++) { float[][][] offsets_arrayThree = new float[offsetsShapes[1]][][]; for (int y = 0; y < offsetsShapes[1]; y++) { float[][] offsets_arrayTwo = new float[offsetsShapes[2]][]; for (int z = 0; z < offsetsShapes[2]; z++) { float[] offsets_arrayOne = new float[offsetsShapes[3]]; for (int i = 0; i < offsetsShapes[3]; i++) { int n = i + z * offsetsShapes[3] + y * offsetsShapes[2] * offsetsShapes[3] + x * offsetsShapes[1] * offsetsShapes[2] * offsetsShapes[3]; offsets_arrayOne[i] = offsets_results[n]; } offsets_arrayTwo[z] = offsets_arrayOne; } offsets_arrayThree[y] = offsets_arrayTwo; } offsets[x] = offsets_arrayThree; } -
对输出节点的数据进行处理,得到骨骼检测demo的返回值
person,实现功能。Conv2D-27中,heatmaps存储height、weight、numKeypoints三种参数,可用于求出keypointPosition位置信息。Conv2D-28中,offset代表位置坐标的偏移量,与keypointPosition结合可获取confidenceScores置信分数,用于判断模型推理结果。通过
keypointPosition与confidenceScores,获取person.keyPoints和person.score,得到模型的返回值person。int height = ((Object[]) heatmaps[0]).length; //9 int width = ((Object[]) heatmaps[0][0]).length; //9 int numKeypoints = heatmaps[0][0][0].length; //17 // Finds the (row, col) locations of where the keypoints are most likely to be. Pair[] keypointPositions = new Pair[numKeypoints]; for (int i = 0; i < numKeypoints; i++) { keypointPositions[i] = new Pair(0, 0); } for (int keypoint = 0; keypoint < numKeypoints; keypoint++) { float maxVal = heatmaps[0][0][0][keypoint]; int maxRow = 0; int maxCol = 0; for (int row = 0; row < height; row++) { for (int col = 0; col < width; col++) { if (heatmaps[0][row][col][keypoint] > maxVal) { maxVal = heatmaps[0][row][col][keypoint]; maxRow = row; maxCol = col; } } } keypointPositions[keypoint] = new Pair(maxRow, maxCol); } // Calculating the x and y coordinates of the keypoints with offset adjustment. int[] xCoords = new int[numKeypoints]; int[] yCoords = new int[numKeypoints]; float[] confidenceScores = new float[numKeypoints]; for (int i = 0; i < keypointPositions.length; i++) { Pair position = keypointPositions[i]; int positionY = (int) position.first; int positionX = (int) position.second; yCoords[i] = (int) ((float) positionY / (float) (height - 1) * bitmap.getHeight() + offsets[0][positionY][positionX][i]); xCoords[i] = (int) ((float) positionX / (float) (width - 1) * bitmap.getWidth() + offsets[0][positionY][positionX][i + numKeypoints]); confidenceScores[i] = sigmoid(heatmaps[0][positionY][positionX][i]); } Person person = new Person(); KeyPoint[] keypointList = new KeyPoint[numKeypoints]; for (int i = 0; i < numKeypoints; i++) { keypointList[i] = new KeyPoint(); } float totalScore = 0.0f; for (int i = 0; i < keypointList.length; i++) { keypointList[i].position.x = xCoords[i]; keypointList[i].position.y = yCoords[i]; keypointList[i].score = confidenceScores[i]; totalScore += confidenceScores[i]; } person.keyPoints = Arrays.asList(keypointList); person.score = totalScore / numKeypoints; return person;
-